
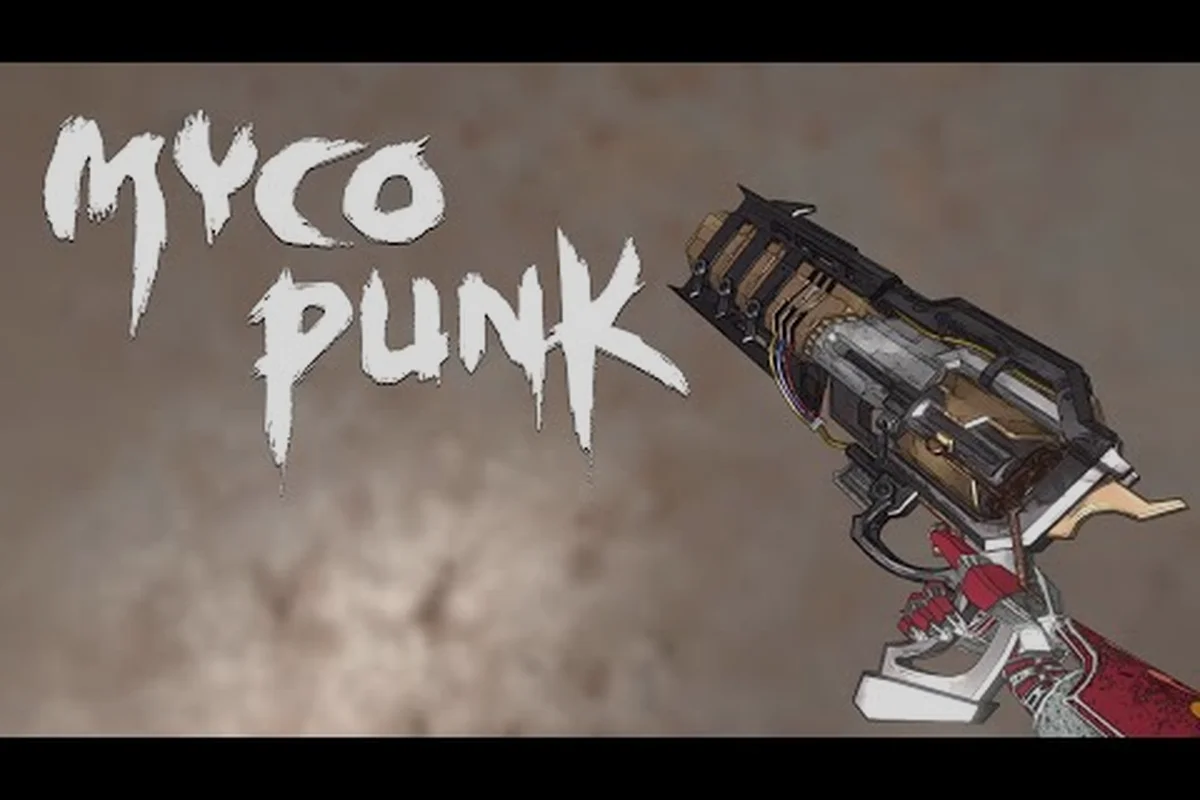
Mycopunk launched its 1.0 update on October 20, 2026, and the gun rack got noticeably heavier: a brand-new ion shotgun joined the arsenal, a fifth employee came online, and a new high-difficulty moon dropped with its own cryo grenade. This Mycopunk weapons list walks through every confirmed firearm, the level gates that lock them, and the fastest routes to get them battle-ready. Whether you main crowd-clear, single-target burst, or elemental setups, the table below tells you which gun to chase first.
Mycopunk Weapons List: The Full Roster at Launch
Across Early Access and the 1.0 patch, the developer has confirmed sixteen weapons in the firearms pool, plus five grenades that act as a secondary weapon slot. The table below groups them by role, listing the official in-game name and the unlock condition the developer has published. Anything without a published gate is type-level information — the team has not yet shared exact thresholds for those pieces.
| Weapon | Role | Unlock Condition |
|---|---|---|
| G6 Streetsweeper | Full-auto crowd clear | Default (available from HUB) |
| A16 Beam Ripper | Continuous beam | Default (available from HUB) |
| Laser Cannon | Heavy precision | Default (available from HUB) |
| The Last Argument | Heavy precision | Default (available from HUB) |
| Swarm Launcher | Crowd add-clear | Default (available from HUB) |
| Au-Si Jackrabbit | Rapid sidearm | Default (available from HUB) |
| Carver | Mid-range rifle | Default (available from HUB) |
| Cycler | Mid-range rifle | Default (available from HUB) |
| Lead Flinger | Heavy launcher | Default (available from HUB) |
| DMLR | Designated marksman | Default (available from HUB) |
| Globbler | Heavy launcher | Default (available from HUB) |
| Accelerator | Heavy launcher | Default (available from HUB) |
| Gunship Cannon | Heavy launcher | Default (available from HUB) |
| Trident | Heavy launcher | Default (available from HUB) |
| Plate Launcher | Heavy launcher | Default (available from HUB) |
| Shocklance | Burst single-target | Unlocks via the Overtime Assignment |
| Diffraction Driver (1.0) | Close-range ion shotgun | Unlocks at player level 10 |
Grenade Roster
Grenades occupy the throwable slot and are the only confirmed source of elemental application for most weapons. The 1.0 patch renamed two legacy grenades — the old Acid Grenade is now Caustic Grenade, and the old Shock Grenade is now Voltaic Grenade. The Snowball Grenade, added in 1.0, is unlocked from the X11-B moonlet.
| Grenade | Element | Unlock |
|---|---|---|
| Photon Disc | Plasma burst | Default |
| Incendiary Grenade | Fire | Default |
| Voltaic Grenade | Shock (was Shock Grenade) | Default |
| Caustic Grenade | Acid (was Acid Grenade) | Default |
| Snowball Grenade (1.0) | Cryo/crowd control | Unlocked from X11-B |
Employee Equipment as a Weapon-Like Slot
The five employees each carry two named pieces of equipment that affect how their weapons perform in combat, so the effective weapon pool stretches beyond the firearm list. Glider's Rocket Salvo and Wingsuit, Scrapper's Grapple Pole and Jetpack, Bruiser's Nose Dive and Shield Projector, and Wrangler's Rocket Lasso and Air Dash are all part of the combat kit. The fifth employee, the Mycologist, is unlocked through the Expedition Alpha rescue mission and brings the Sporelift, the Fungal Skewer, and the Infection passive — though the developer has not published her full ability damage, cooldowns, or upgrade tiers, so deeper numbers are deliberately left out here.
How to Unlock Weapons Fast in Mycopunk
Every weapon in the default pool is technically available from the HUB the moment you finish the tutorial, but several are gated behind a player level or a specific assignment. Hitting those gates quickly is the difference between running the A16 Beam Ripper for the entire early game and reaching the Diffraction Driver within your first play session.
The Two Real Unlock Gates
In the current 1.0 build, only two weapons sit behind non-trivial unlock gates, while the rest of the Mycopunk weapons list is freely selectable from the HUB weapon rack on any save file. Both of these exceptions were added or revised after launch, which is why veterans who cleared the original Early Access armory don't always realize new gates exist until they check the Codex or scroll the full weapon list on the HUB terminal.
-
Shocklance — awarded after you complete the Overtime Assignment, which the developer lists as its only published gate.
-
Diffraction Driver — unlocks automatically when the player account hits level 10. The level curve is tied to overall player progression rather than a single weapon, so leveling any one weapon does not speed it up on its own.
Every other firearm in the official list is available from the HUB weapon rack from the start of a save. Players sometimes feel locked out because the in-game Codex (the inventory tab that lists weapons, upgrades, skins, and data logs) only shows entries you have personally handled at least once, so new weapons can appear "hidden" until you physically pick them up during a mission. If you are looking for the fastest way to fill your Codex, running short Incursion loops and grabbing every weapon pickup on the ground is the most reliable method.
Leveling Route for the Fastest XP
Each weapon levels up independently, and the weapon's own level feeds back into the upgrade rotation unlocks (Standard at level 3, Rare at 8, Epic at 16, Exotic+ at 30). Because of that, the fastest unlock path looks like this:
-
Pick one starter weapon that matches the role you want to main — the G6 Streetsweeper for crowd clear, the A16 Beam Ripper for beam pressure, the DMLR for precision.
-
Run short missions back-to-back — Ouroboros Blitz (the 13-room short variant of the Ouroboros mode) and lower-threat Incursions give the best XP-per-minute ratio for an under-leveled weapon.
-
Swap off the starter at level 8 to begin unlocking Rare upgrades, then again at level 16 for Epic. Weapon XP keeps accruing on a weapon even when it sits in your Loadout but isn't being fired, so cycling your Loadout instead of the weapon itself is the cleanest play.
-
Reach player level 10 by the time your starter hits level 8 — the natural mission cadence will usually get you there. Once the Diffraction Driver is unlocked, run a few missions with it to seed it into your Codex.
A wider progression overview, including player-level thresholds and weekly reset cadence, lives in the leveling guide, which is worth a read if you want to plan beyond the first ten hours.
Mycopunk Weapon Tier List: Best Weapons by Role
A clean Mycopunk weapon tier list sorts the roster by what each gun is best at, not by a single universal ranking. Because every weapon has access to the same upgrade pool, the role-based breakdown below is built around base behavior and the elements it can apply. Treat the top row in each category as the strongest published option, and the second row as the accessible alternative while you grind unlocks.
Crowd Clear and Add Management
| Tier | Weapon | Why it ranks here |
|---|---|---|
| S | Swarm Launcher | Wide area denial; pairs with Telepathic Charging skin for the early cosmetic flex |
| A | G6 Streetsweeper | Default unlock, full-auto, generous mag |
| A | Globbler | Lobbed heavy rounds that chain into clusters |
| B | Accelerator | Slow fire rate but high per-shot; renamed upgrade path at 1.0 (Combustive Rounds) |
Single-Target and Boss Damage
| Tier | Weapon | Why it ranks here |
|---|---|---|
| S | Shocklance | Burst-style; pairs with the official Storm's Eye upgrade for sustained pressure |
| A | A16 Beam Ripper | Continuous beam that scales with the upgrade grid |
| A | The Last Argument | Heavy precision pick for the back line |
| B | Laser Cannon | Slower charge but very high payoff per hit |
Mid-Range Versatility
| Tier | Weapon | Why it ranks here |
|---|---|---|
| S | DMLR | Designated marksman; thrives in the 30-60m band |
| A | Au-Si Jackrabbit | Fast swap-in sidearm when the DMLR reloads |
| B | Carver / Cycler | Default mid-range rifles that work while the DMLR levels |
Elemental Application
Elemental effects in Mycopunk are mostly driven by the grenade slot rather than applied directly by the weapon itself, which is why this tier list focuses on how each gun's base behavior and upgrade path can complement a specific element instead of ranking raw elemental damage. A weapon like the A16 Beam Ripper has no built-in plasma tag, but its continuous beam lets it feed procs into a Plasma Grenade's arc chain far more efficiently than burst-fire alternatives. Weapon level, mod sockets, and the perk rolls you chase during weapon leveling all matter more than the gun's intrinsic element, so pair choices in the table below should be re-evaluated whenever you unlock a new upgrade tier or reroll a perk in the loadout screen.
| Best Paired Element | Weapon | Reasoning |
|---|---|---|
| Cryo | Diffraction Driver | Ion shotgun has wide cone; freeze crowds for shotgun follow-up |
| Plasma | A16 Beam Ripper | Continuous damage to exploit plasma arcs |
| Acid | G6 Streetsweeper | High fire rate to apply Caustic Grenade acid pools |
| Shock | Swarm Launcher | Spread of projectiles maximizes Voltaic Grenade chains |
| Rot | Lead Flinger | Slow, heavy shots that trigger rot ticks on grouped enemies |
The full Mycopunk weapons list in the previous section should be cross-referenced against the table above before you commit to a single weapon — the developer has not published per-weapon damage numbers at 1.0, so the tier placement here is based on base behavior, upgrade synergies the team has named publicly, and the official role each weapon occupies in the upgrade grid.
Mycopunk Best Weapons: Standout Picks for Common Playstyles
If you only have time to level a few weapons, the picks below cover the three playstyles the developer has telegraphed through mission design. Each pick is based on a default-available weapon or a weapon with a clearly published gate.
Solo Queue Bruiser
The Bruiser employee is built around a Shield Projector and Nose Dive, so pairing the G6 Streetsweeper with the Caustic Grenade is a strong default. The Streetsweeper clears trash fast, the Caustic pools let you kite larger threats, and the Bruiser's shield absorbs the chip damage you take while repositions. If you want a side-grade with more elemental punch, the Globbler throws splash damage into clusters of grunts and the Voltaic Grenade chains from there.
Squad Anchor and Crowd Control
The Wrangler's Rocket Lasso pulls enemies into a tight ball, and the Swarm Launcher is the natural pairing because the spread radius catches everything the lasso drags in. Add the Photon Disc as your grenade of choice — its plasma burst has the largest hit volume of any confirmed grenade, so the Disc plus a lasso plus a launcher volley is a hard combo to walk away from. The Swarm Launcher's Telepathic Charging skin is the only weapon-specific named cosmetic the developer has published, so picking this weapon also unlocks the skin naturally.
Burst Damage Hunter
For single-target hunters, the Shocklance is the standout. Its public upgrade list includes Storm's Eye, which is the only upgrade name the developer has explicitly tied to a specific weapon in an official post. The A16 Beam Ripper is the default-accessible alternative for players who have not yet cleared the Overtime Assignment. For a deeper dive into loadouts and exotic upgrades, the best weapon builds page goes into pairing options and Strange Component sinks in more detail.
Mycopunk Weapon Leveling and Upgrade Path
Every weapon shares the same upgrade grid (the hex-pattern upgrade board you access from the HUB) and the same rarity rotation tied to its own level. The table below summarizes the official thresholds, with the reward the developer has published for each tier.
| Weapon Level | Upgrade Rarity Unlocked | Notes |
|---|---|---|
| 3 | Standard | First damage or utility roll on the board |
| 8 | Rare | Two Rare slots open on the hex grid |
| 16 | Epic | Epic unlocks start to define the build |
| 30 | Exotic+ | Top rarity on the standard rotation |
| 32 | (Reward threshold) | A documented weapon-level reward gate |
Once a weapon hits level 30, you can keep feeding it XP through Antimass Substrate and Strange Components, but the rarity ceiling on the standard rotation stays at Exotic+. Contraband and Oddity rarities are reserved for the Ouroboros roguelike mode, so they will not show up on a standard mission loadout. Broken Frame upgrades are special — they are unusable as upgrades and cannot be scrapped, so the Codex tab will list them but the Pattern Infuser will reject them.
What to Spend Antimass On First
The Pattern Infuser in the HUB is where Antimass Substrate turns into weapon upgrades, and it is the only sanctioned way to fill the grid outside of mid-mission drops. The fastest route through the early Antimass economy looks like this:
-
First, level the starter weapon to 3 so you can equip a Standard upgrade without wasting a slot.
-
Second, focus Antimass on a single weapon rather than spreading it thin across your whole arsenal. The diminishing return on a half-finished grid is steeper than the loss from a slower second weapon.
-
Third, save Strange Components for Turbocharge exotic upgrades instead of spending them on a Rare slot you could have filled with Antimass.
For more granular farming tips, the upgrade farming guide covers Saxonite routes and the Antimass loop in more depth, including the specific HUB stages that respawn Saxonite nodes every ~90 seconds and how chaining Antimass drops from mid-mission elites before returning to the Pattern Infuser can net roughly 40% more Substrate per run compared to looping the same encounter twice.
The Upgrade Grid at a Glance
| Rarity | Source | Notable Mechanic |
|---|---|---|
| Standard | Pattern Infuser / mission drops | Foundation of every build |
| Rare | Pattern Infuser / mission drops | Opens at weapon level 8 |
| Epic | Pattern Infuser / mission drops | Opens at weapon level 16 |
| Exotic | Pattern Infuser / mission drops | High-impact named effects |
| Exotic+ | Pattern Infuser / mission drops | Opens at weapon level 30 |
| Contraband | Ouroboros only | Cannot be earned outside the roguelike |
| Oddity | Ouroboros-common | Frequent in roguelike runs |
| Broken Frame | Various | Cannot be scrapped; Pattern Infuser rejects |
Mycopunk Weapon Builds and Loadout Pairings
A loadout is a saved combination of employee, primary weapon, and grenade that can be swapped on the fly from the HUB, so the goal of a "build" is to make every part of the kit reinforce the same role. The developer has published several named upgrades, and the official 1.0 announcement calls out a few specific pairings worth replicating in your own Loadout.
Crowd Control Build (Bruiser + Globbler + Caustic Grenade)
The Bruiser's Shield Projector keeps you alive while the Globbler's splash clusters group enemies into the Caustic Grenade's acid pools. The Voltaic Grenade is a one-off substitute if you want to chain lighting through the same clusters; the Photon Disc is the burst-damage alternative when you know a wave is coming.
Burst Build (Wrangler + Shocklance + Photon Disc)
Pull a tough target with the Wrangler's Rocket Lasso, drop a Photon Disc under it, then unload the Shocklance. The Shocklance's Storm's Eye upgrade feeds right into this kit because it converts the burst into sustained single-target pressure, which is exactly the window the Disc creates. This build is the strongest argument for the Shocklance being the Mycopunk best weapon for single-target play.
Beam Sustain Build (Scrapper + A16 Beam Ripper + Voltaic Grenade)
The Scrapper's Grapple Pole lets you reposition while the beam stays connected, and the Voltaic Grenade's shock chains roll through enemies the beam has already softened. For players who want to read up on the deeper upgrade math, the employee upgrades page covers each employee's kit and which weapons each one naturally buffs.
Element Pairing Cheat Sheet
| Element | Best Grenade | Best Paired Weapon | Why |
|---|---|---|---|
| Cryo | Snowball Grenade | Diffraction Driver | Freeze, then sweep with the wide ion cone |
| Plasma | Photon Disc | A16 Beam Ripper | Continuous damage keeps plasma arcs alive |
| Acid | Caustic Grenade | G6 Streetsweeper | High fire rate stacks acid pools |
| Shock | Voltaic Grenade | Swarm Launcher | Spread maximizes shock chains |
| Rot | Incendiary Grenade | Lead Flinger | Slow heavy shots trigger rot on grouped targets |
| Bees / Water | (Elemental sources limited) | Swarm Launcher | Best general crowd tool for unknown elements |
The developer has not published a closed element rotation, so mission spawns pull from a broader pool that includes cryo, plasma, acid, rot, blood, shock, bees, and water, but the cheat sheet above only lists rows where a specific grenade has been confirmed in datamined tooltips and community testing. Rows marked "(Elemental sources limited)" — like the Bees / Water entry — flag that no dedicated grenade has been tied to that element yet, so pairing decisions there fall back to crowd-control weapons such as the Swarm Launcher until a dedicated mycopunk weapons list entry is added in a future patch.
Frequently Asked Questions
How many weapons are in Mycopunk at launch?
The developer has confirmed sixteen firearms in the 1.0 build, plus five grenades that occupy the secondary weapon slot. Of those sixteen firearms, eight are purchasable from the Quartermaster at specific player levels while the remaining eight are gated behind Overtime Assignments, Hidden Cache pickups, or community-event milestones tracked in the Codex — and the five grenades each require a separate unlock chain tied to Incursion completion counts rather than weapon leveling. The full Mycopunk weapons list above names all of them and their published unlock conditions.
What is the fastest way to unlock the Diffraction Driver?
Reach player level 10. The Diffraction Driver is gated on overall player progression, not on any one weapon, so running short Incursion or Ouroboros Blitz missions with whatever weapon you have leveled fastest is the cleanest path to its unlock.
What is the best weapon for solo play in Mycopunk?
The G6 Streetsweeper is the strongest default pick for solo play because it has a generous magazine, full-auto fire, and reliable crowd-clear that does not depend on a coordinated squad. The Shocklance is the stronger choice once you have cleared the Overtime Assignment, and the A16 Beam Ripper is the closest accessible alternative before then.
Do weapon skins affect performance?
No. Skins in Mycopunk are purely cosmetic. The developer has published skin names including Crystalline, Rainbow, Skeletal Ghost, Entombed, Uniform, Chrome (Supporter Pack), Leopard (Wrangler), Brawler (Bruiser), Tiedye (Scrapper), Firestorm (Glider), and Telepathic Charging (Swarm Launcher), and none of them alter the underlying stats of the gun they sit on.
Is there a Mycopunk weapon tier list I can trust?
The role-based Mycopunk weapon tier list below is built from the developer's own official descriptions and the upgrade names they have confirmed, not from third-party testing. Because the game launched 1.0 only one day before this guide was built, community data is essentially non-existent, so the tier placement here leans on the role each weapon occupies in the upgrade grid and the upgrade synergies the team has named publicly — for the most current community testing, check the official Discord and the Mycopunk on Steam announcement feed, where the developer posts balance changes.