
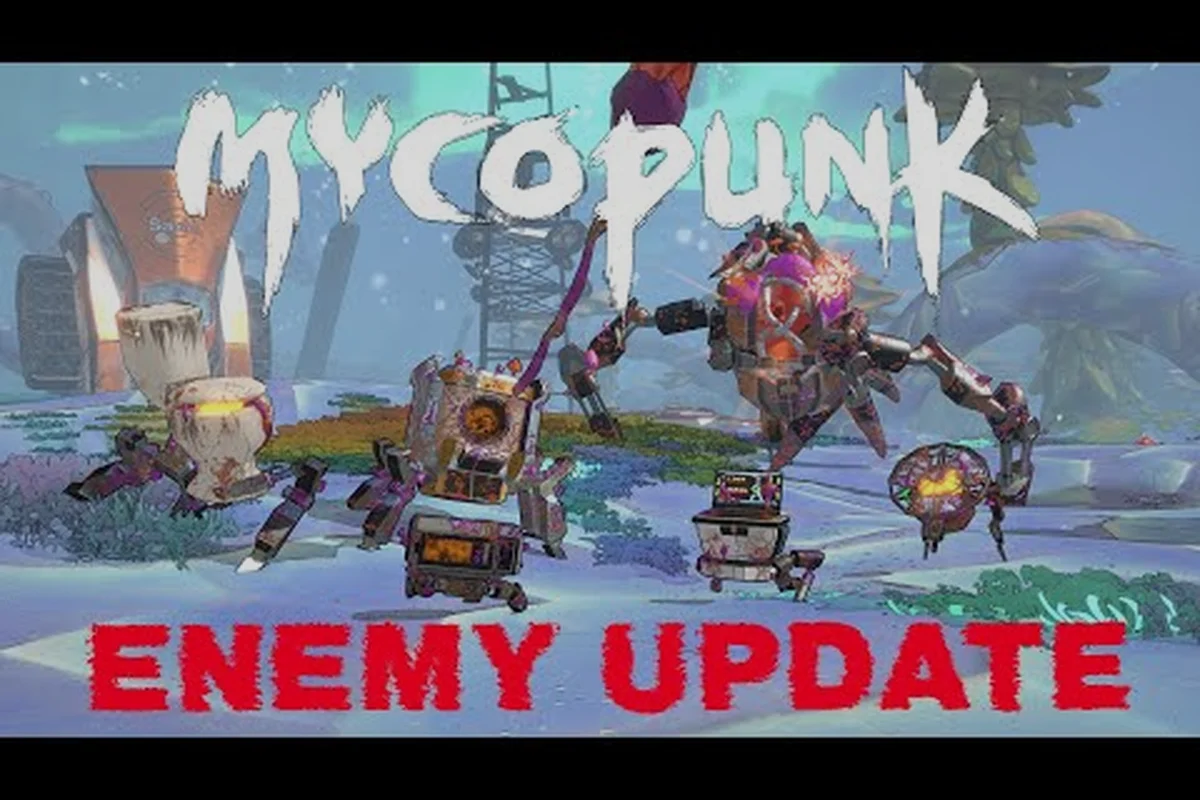
The 1.9 Enemy Update rewired nearly every fight on New Atlas, so the roster you memorized in Early Access is now a moving target. This mycopunk enemy guide walks through every confirmed foe, from rank-and-file Brutes to the towering Amalgamation, and maps each one to the cores, shells, and modifiers that decide your damage output. Whether you main Glider's rocket salvo or stand behind Bruiser's shield projector, knowing what walks toward you changes which loadout you should be wearing.
Cores, Shells, and the New Anatomy of Every Foe
The single biggest shift in patch 1.9 is the way enemy bodies are now built. According to the official 1.9 Enemy Update announcement on Steam, almost every enemy was redesigned around the idea that the New Atlas fungus physically infects machines. The fungus does more than change the art: it bobs enemy bodies as they move, soft-caps how many of the heaviest units can be on screen at once, and shifts the audio mix of damage sounds based on remaining health on either a core or a shell.
That distinction matters because every fight in mycopunk enemy types is now a two-layer problem. The core is the central mass of the machine — usually a glowing chest, head, or spine — and it takes bonus damage from any weapon that calls out a weak point. The shell is the armored plating around the core, including legs, weapons, and shield panels, and it absorbs most of the splash and element damage you throw. Reading a fight means reading which layer is still standing, and the new red outlines on dangerous enemy parts make that visible at a glance for the first time.
| Layer | What It Does | How to Spot It | Damage Behavior |
|---|---|---|---|
| Core | Hosts the main weak-point multiplier and most boss HP pools | Glowing chest, exposed spine, or pulsing center mass | Bonus damage from precision weapons and weak-point upgrades |
| Shell | Absorbs splash, status effects, and chip damage | Armored panels, legs, weapons, shield arrays | Resistant to AoE, takes full damage from heavy hits |
| Detached Part | Leg, sensor, or weapon that broke off under fire | Bobbing, fungus-wrapped debris that still shoots or pulses | Counts as its own micro-target for shots and abilities |
| Red Outline | Indicates a high-threat, detonation-risk part on the body | Glowing red highlight added in 1.9 | Avoid melee swings; prioritize ranged stagger |
The detached-part system is one of the most underrated mycopunk enemy guide tips for new crews. A Brute that loses both front legs at Threat 4 keeps crawling and swinging, and the leftover sensor still calls reinforcements if nobody clears it. Treating each part as a separate kill is the difference between a clean Amalgamation pull and a chain revive.
What the 1.9 Redesign Actually Changed
Before the June 2026 patch, fights were a flat damage race: shoot the body until the bar emptied, then collect drops. After 1.9, the same encounter is a layered puzzle that punishes the "spray and pray" mindset. The official patch notes list five concrete changes that show up in every mycopunk enemy type.
-
Bodies bob and lean as they move — fungus-style animation, not just hit reactions
-
Soft caps on heavy spawns — fewer simultaneous Brutes and Abominations to prevent spawn-room pile-ups
-
Damage sound shifts with remaining HP — both on cores and shells, so audio cues replace visual scanning
-
Red outlines on dangerous parts — telegraphed detonations, charge attacks, and ranged bursts
-
Two new enemies added — the Abomination Lacerator (a melee-only abomination) and the Antigrav Drone (a hovering scout)
The Optical Jammer's health pool was also lowered slightly, and the Amalgamation received what the developer describes as "re-tuned fight pacing." None of these changes are cosmetic; they all flow into how mycopunk enemy types reward positioning over raw output.
How Cores and Shells Interact With Elements
Elemental damage in mycopunk enemy types is split between shell-eating and core-breaker elements. Status effects like plasma, acid, and rot are most efficient when applied to the shell because they spread across panels and chunks, while shock and cryo tend to gate abilities, not raw damage. The developer has not published a closed element list, but the official 1.0 patch notes confirm cryo, plasma, acid, rot, blood, shock, bees, and water as known effects.
A practical example: the Missilehead has a thick missile-pod shell that is weak to shock so the pods stop cycling, but the glowing chest core is weak to plasma for the kill window. The same is true for the Devastator, whose shield arrays are acid-vulnerable and whose central spine is blood-vulnerable once the shell is gone. Reading those pairings is the heart of any solid mycopunk enemy guide.
The Full Roster: Standard Enemies You Will Face at Every Threat Level
The standard mobs in mycopunk enemy types fall into three families: light infantry, heavy brutes, and ranged specialists. Each family spawns across every region but scales with threat level rather than location. The 1.9 soft caps mean you will never see more than a handful of heavies at once, which keeps encounters readable but raises the per-unit pressure.
Light Infantry and Swarmers
These are the bread-and-butter mobs that show up in every region, from the Gravity Farm shipping lanes to the Moldy Tundra to Titan City. They die fast but overwhelm through numbers, and they are the primary source of Saxonite drops on lower threats.
| Enemy | Role | Core vs. Shell | Common Element Weakness | Notes |
|---|---|---|---|---|
| Rocket Grunt | Ranged chaff | Core is the backpack | Shock to disable rockets | Most common enemy in the game |
| Pixie | Fast melee | Tiny core, fragile shell | Cryo to slow rush | One-shot kill potential |
| Hornet | Mid-range sniper | Core in the tail | Shock to break lock | Pairs badly with Glider's wingsuit |
| Autocannon | Stationary turret | Fixed core on the back | Plasma for core burn | Counts as a fortified position |
| Pummeler | Slow heavy melee | Shell-first, core is the back-mounted reactor | Acid to strip armor | Often spawns with a Grunt escort |
Heavy Bruisers and the Brute Family
The Brute is the textbook example of the core/shell design. Its shell is the entire walking chassis, and the core is the chest cavity hidden behind the front plate. The 1.9 soft caps mean that at Threat 7 you will rarely see more than two Brutes alive at once, but each one can absorb enough punishment to solo a low-tier squad.
| Variant | Movement | Shell Layers | Core Expose Trigger | How to Kill It |
|---|---|---|---|---|
| Standard Brute | Walking | 3 panels + chest plate | When both arms are destroyed | Focus arms, then chest |
| Copter Brute | Hover | Rotating shield ring | After shield ring stalls out | Use shock to stall rotors |
| Devastator | Walking siege | Shield array + body | When shield array is down | Acid strips shields, then core |
| Cranius | Stationary boss | Four armor segments | When all segments are cracked | Elemental combos per segment |
| Missilehead | Mobile artillery | Pod array + chassis | When pod array is destroyed | Shock the pods, plasma the core |
For players trying to map mycopunk enemy types onto a build, the heavy family is where loadout choices stop being theoretical. A Bruiser with a Shield Projector can hold aggro on a Brute while a Scrapper's grapple pole yanks the back panel off, and a Glider's rocket salvo deletes the exposed core. Without that role split, the Brute simply out-tanks the squad.
Ranged Specialists and Drones
The new Antigrav Drone added in 1.9 is the most disruptive ranged unit because it floats above melee range and the soft cap doesn't apply to it. The Optical Jammer is the second most disruptive; the 1.9 patch lowered its health pool slightly but kept its jamming cone, which still blanks your HUD and minimap inside its radius.
| Enemy | Range | Special Ability | Counter | Spawn Notes |
|---|---|---|---|---|
| Antigrav Drone | Long | Hovers and snipes | Shocklance alt-fire, Swarm Launcher | 1.9 addition, no soft cap |
| Optical Jammer | Medium | Jams HUD, blinds squad | High burst damage, plasma burn | Health lowered in 1.9 |
| Autocannon | Long | Turret mode, suppressive fire | Cryo to freeze, acid to strip | Common in City and Desert |
| Hornet | Medium | Mid-range snipe | Shock to break lock | Pairs badly with Glider's wingsuit |
Bosses, Sub-Bosses, and the Amalgamation Loop
Bosses in mycopunk enemy types are scaled-up versions of standard units, not separate creatures. The Amalgamation is a 30-second timer boss that spawns at the end of Amalgamation Hunt missions, and the Abomination Lacerator is the new 1.9 melee-only sub-boss that gates the harder Abomination Assault runs. The Cranius is the rotating four-segment mini-boss, and the Devastator fills the role of stationary siege boss.
| Boss | Fight Type | Timer | Core Mechanic | Drop Tier | Common Source |
|---|---|---|---|---|---|
| Amalgamation | 30-second DPS race | 30s | Expose core, dump damage | Exotic / Pattern Infuser | Amalgamation Hunt |
| Abomination Lacerator | Melee-only sub-boss | None | Dodge lunges, punish openings | Exotic+ | Abomination Assault |
| Cranius | Four-segment mini-boss | None | Crack each armor segment | Epic / Exotic | City, Desert |
| Devastator | Stationary siege | None | Strip shield array first | Epic / Exotic | Titan City, Tundra |
| Missilehead | Mobile artillery boss | None | Shock the pod array | Epic | Mid- and high-threat missions |
For a deeper look at how spawns feed into the Amalgamation Hunt mission type, the enemy spawns guide covers the soft caps and the way the 30-second timer constrains your pull. Knowing the soft caps helps you understand why mycopunk all bosses feel fair even at Threat 7: you will never fight more than one of the heavy bosses at once.
The Amalgamation Loop in Practice
The Amalgamation is the most tested boss in the mycopunk enemy guide tier list, and the reason is the 30-second timer. You have 30 seconds from the moment its core exposes to deal enough damage to kill it; miss the window and it retreats underground, ending the run. This is the closest the game has to a "secret boss" encounter in terms of payoff per pull.
-
Phase 1 — Soft Cap Peel: Clear the surrounding Brutes and Pummelers so the boss is not eating your splash
-
Phase 2 — Shell Strip: Apply acid to the front panel, then plasma to start the core tick
-
Phase 3 — Core Dump: At 30s remaining, switch to high-burst weapons (Shocklance alt-fire, Swarm Launcher alt-fire)
-
Phase 4 — Loot Window: Collect Antimass Substrate, Exotic patterns, and Pattern Infuser fuel from the corpse
The mycopunk amalgamation guide loop is the cleanest way to farm Strange Components for the Turbocharge system, and the same loop gates the Exotic+ upgrade rolls. If you are chasing a weekly reset of Amalgamation Hunt, the same loop scales to Threat 7 without changing phase order, only the surrounding trash density.
Sub-Bosses, Mini-Bosses, and the Weekly Rotation
Beyond the Amalgamation, mycopunk enemy types include a rotating set of sub-bosses that appear in the weekly mission board. The Abomination Lacerator is the most consistent of these because it is tied to the new Abomination Assault mission type, but the Cranius, Devastator, and Missilehead all rotate through the Incursion and Ouroboros mission pools. A clean mycopunk weekly boss run is the fastest way to push your employee level toward the 30 cap.
| Mission Type | Primary Boss | Secondary Foes | Best Employee | Reset Window |
|---|---|---|---|---|
| Amalgamation Hunt | Amalgamation | Brutes, Pummelers | Glider (rocket salvo) | Weekly |
| Abomination Assault | Abomination Lacerator | Abominations, Lacerators | Bruiser (shield projector) | Weekly |
| Oxythane Breach | Devastator | Oxythane-enhanced Brutes | Wrangler (rocket lasso) | Weekly |
| Ouroboros Blitz | Rotating | Mixed | Scrapper (grapple pole) | Per run |
| Incursion | Cranius or Missilehead | Mixed heavies | Glider or Scrapper | Per run |
Element Pairings, Modifiers, and How Enemy Design Forces Your Build
The 1.9 redesign makes elemental pairings mandatory rather than optional. Every standard mob in mycopunk enemy types has a shell and a core, and the right element to strip the shell is rarely the right element to break the core. Picking the wrong element on the wrong layer is the single biggest mistake new crews make, and it is also why the modifier system exists.
Mission modifiers stack on top of enemy design. The full breakdown lives in the enemy modifiers guide, but the short version is that modifiers add behaviors like "enemies enrage at low HP" or "detached parts detonate on death." These modifiers do not change which element a shell takes, but they do change how long you have to apply that element before the body blows up.
Element-to-Layer Cheat Sheet
This is the pairing matrix I use as the baseline for any mycopunk enemy guide loadout decision. It is built from the official 1.0 patch notes, which confirm the existence of the elements but do not publish a closed list. Treat the table as a directional guide, not gospel, because the developer has not published a complete element table.
| Element | Best Target Layer | Strongest Against | Weakest Against | Notes |
|---|---|---|---|---|
| Plasma | Core | Devastator, Cranius, Missilehead | Light infantry (overkill) | Burns cores after shell strip |
| Acid | Shell | Brutes, Pummelers, Devastator shield | Hovering units (resist) | Spreads across panels |
| Cryo | Shell + Control | Pixie swarms, Hornet snipers | Heavies (slow strip) | Locks legs and turrets |
| Shock | Pods + Abilities | Missilehead, Antigrav Drone | Brutes (partial) | Disables cycling weapons |
| Rot | Shell → Blood finisher | Blood-tagged enemies | Isolated units | Explodes on death |
| Blood | Core | Tagged enemies post-rot | Clean units (no payoff) | Payoff element |
| Bees | AoE chaff | Pixies, Rocket Grunts | Heavies (chip only) | Soft-cap friendly |
| Water | Utility | Fire-tagged units | Cryo (cancel) | Cleanses fire stacks |
Modifier Stacking and Build Forcing
Modifiers are the second lever that turns mycopunk enemy types from a sandbox into a build puzzle. The most punishing modifier for new crews is "enrage at low HP," because it forces you to either burst the body in one window or strip the shell before enrage. The 1.9 red outlines on dangerous parts also matter here: a detached leg with a red outline will detonate on death, so you want to kill it with ranged shots, not melee swings.
| Modifier | Effect on Enemy | Best Counter | Worst Matchup |
|---|---|---|---|
| Enrage at Low HP | Damage and speed spike below 30% | High-burst weapons (Shocklance, Swarm Launcher) | Slow strip weapons (DMLR) |
| Detached Parts Detonate | Destroyed parts explode after a short fuse | Range, AoE away from squad | Melee-centric Bruiser builds |
| Elemental Resonance | Enemies take +damage from one element | Single-element focus loadout | Hybrid builds |
| Reinforcement Wave | Killed enemies spawn a smaller add | AoE clear, chaff weapons | Single-target boss builds |
| Fungus Bloom | Enemies leave damaging ground on death | Mobility, positioning | Stationary Autocannon fights |
The mycopunk enemy types system is intentionally designed to push you off the "one loadout fits all" mentality. The 1.9 redesign made soft caps and shell/core layering visible, and modifiers force you to actually use the cores/shells mechanic. A clean crew is one that has at least one shell-stripper, one core-burner, and one control weapon in every mission.
Frequently Asked Questions
What are the mycopunk enemy types I should learn first as a new player?
Start with the Rocket Grunt, Brute, and Antigrav Drone, because those three cover the full core/shell/element spectrum. Once you can read a Brute's shell and core, the heavier bosses stop feeling like bullet sponges and start feeling like puzzles.
Where is the mycopunk secret boss location, and how do I unlock it?
The developer has not published a secret boss spawn location, and the 1.0 Known Issues list does not reference one. If a hidden encounter is added in a future patch, the official Steam announcements page and the official Mycopunk website are the first places it would be confirmed.
What is the best mycopunk all bosses order for farming Strange Components?
Run the Amalgamation (Amalgamation Hunt) for raw Antimass, then chain into the Abomination Lacerator (Abomination Assault) for Exotic+ pattern drops. Finish with a Cranius or Devastator Incursion to round out Epic upgrade material. That order keeps your employee XP climbing toward the level 30 cap.
Does the mycopunk weekly boss rotate change the drop table?
Yes. The weekly mission board swaps the boss lineup, but the drop tiers stay consistent: Amalgamation drops Exotic and Pattern Infuser fuel, Abomination Lacerator drops Exotic+ patterns, and rotating mid-tier bosses drop Epic rolls. The rotation matters more for which elements you bring than for which drops you chase.
Are there any mycopunk enemy types I should ignore at lower threat levels?
Light infantry like the Rocket Grunt and Pixie are worth clearing for the Saxonite drop rate (about 60% at Threat 7), but they are not worth chasing at Threat 1-3. Save your burst weapons for heavies and let the chaff die to AoE on the way out.