
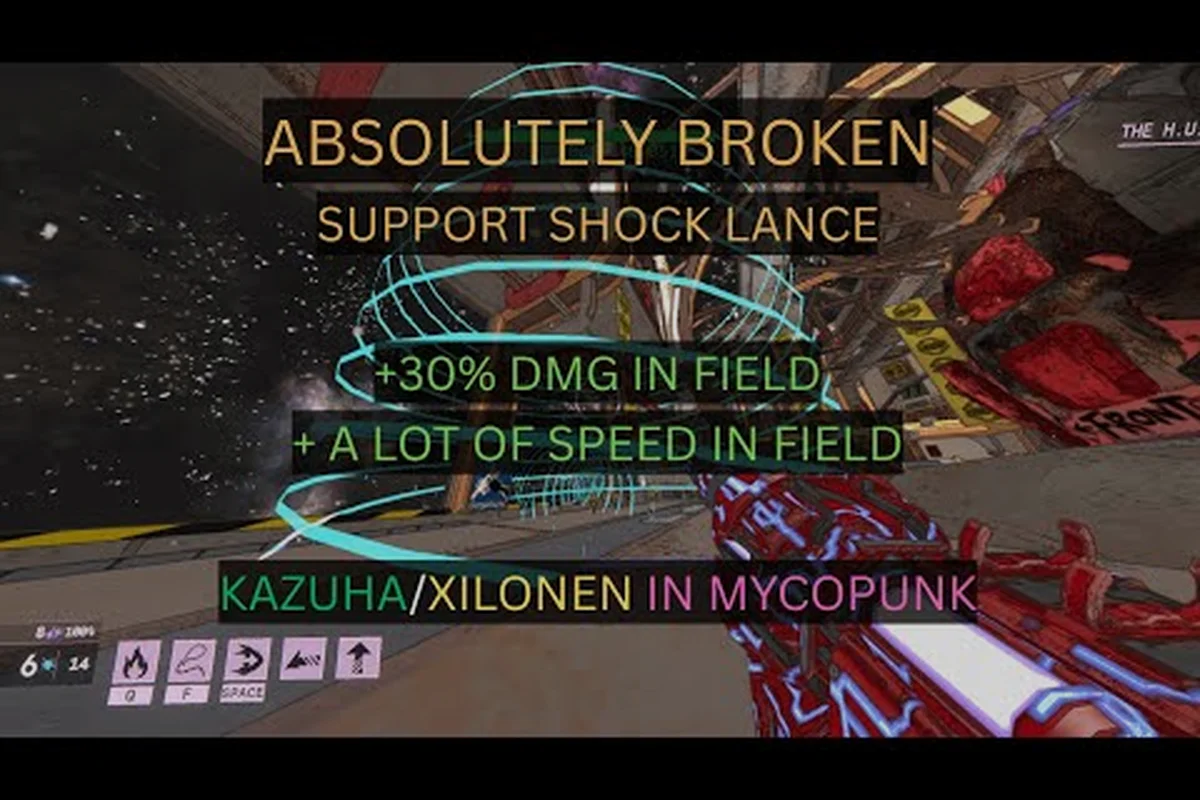
The Mycopunk support build is the difference between a squad that melts on Threat 7 and a squad that walks through an Amalgamation timer without losing a single bag of Saxitos. Pigeons at Play's 1.0 release (October 20, 2026) shipped five playable employees, mission modifiers that scale lethality, and a Hex-pattern upgrade board where one bad node can void an entire run. If you have ever watched a Bruiser dive into a swarm and immediately get deleted, the problem was almost always that nobody was running a proper tanky healer. This guide breaks down which Mycopunk characters anchor the front line, which Wrangler ability loadout keeps the team topped off, and how to farm Antimass fast enough to actually afford the upgrades that make the build work.
Why a Tanky Support Is Essential in Mycopunk
The mission design punishes squishy teams harder than almost anything else in the co-op shooter space. Ouroboros Blitz throws 13 rooms of escalating Amalgamation pressure at your squad, Escalation missions stack modifiers that compound damage intake, and X11-B — the 1.0 moonlet that orbits New Atlas — adds periodic electromagnetic storms that disable abilities outright. In that environment, raw damage dealers drop like flies, while a properly built tanky support gives the squad room to breathe, reposition, and actually use the upgrade grid they just paid for.
The game uses the word "employee" rather than "class" for its five robot archetypes, but functionally the roles split into damage, support, and hybrid tiers. The Mycopunk characters list breaks down every playable unit, but the short version is that only a handful of employees can credibly anchor a support playstyle at high threat. Picking the right one is the first decision; picking the right Wrangler, Bruiser, or Glider ability pairing is the second; and picking the right healing-oriented upgrades from the hex grid is the third.
The Three-Build Triad in Co-op
Every squad eventually settles into a soft trinity: one tanky front-liner, one sustained damage source, and one utility / healer. A solo player trying to fill all three slots is fighting the game's design rather than with it. The support role in this trinity is uniquely valuable because it does not need a damage meter to prove its worth — a Wrangler who lands Air Dash resets on a downed Bruiser, or a Glider who keeps a Scrapper alive through a Missilehead barrage, will always out-contribute a damage dealer who keeps dying in the same doorway.
What "Support" Actually Means Here
In Mycopunk, "support" is not a green-bar healer. Healing items exist but they are limited, and the HUB vendor does not sell potions by the stack. Real support comes from crowd control (Bruiser's Shield Projector, Wrangler's Rocket Lasso yank), mobility peels (Glider's Wingsuit boost, Scrapper's Grapple Pole pull), and survival utility (Death Protection charges, Armor satchels dropped by the Blitseg hover bike, Saxonite stockpiles spent at the Pattern Infuser). A support build fuses all three layers so the squad never has a single point of failure.
The Best Mycopunk Characters for a Tanky Support Build
Picking the right employee is half the support puzzle. Below is a tier snapshot of the five Mycopunk characters rated by their ability to anchor a tanky support build, ranked against the data on the official Mycopunk store page and 1.0 patch notes.
| Employee | Signature Abilities | Support Tier | Tanky Rating | Healing / Peel Tools |
|---|---|---|---|---|
| Wrangler | Rocket Lasso, Air Dash | S | High | Lasso yanks priority targets; Air Dash resets downed allies |
| Bruiser | Nose Dive, Shield Projector | A | Very High | Shield Projector creates a literal damage wall for the squad |
| Glider | Rocket Salvo, Wingsuit | A | Medium | Wingsuit repositions the entire backline; Rocket Salvo staggers |
| Scrapper | Grapple Pole, Jetpack | B | Medium-Low | Grapple Pole pulls allies out of danger zones |
| Mycologist | Sporelift, Fungal Skewer, Infection (passive) | Unrated | Unknown | Developer has not published full upgrade tree or numbers |
The Wrangler stands out because Air Dash doubles as a movement cooldown reset for the entire team when used near a downed ally, and Rocket Lasso yanks high-value targets out of cover. The Bruiser wins raw tankiness because Shield Projector creates a deployable cover bubble that absorbs incoming fire — it is the closest thing Mycopunk has to a healing aura. The Glider and Scrapper are more hybrid; they can support, but only if the player commits to peeling rather than dealing damage.
Why the Wrangler Is the Default Support Pick
Of all the Mycopunk characters, the Wrangler has the cleanest support toolkit. Air Dash is on a short cooldown, the dash itself is generous on i-frames, and the ability reset triggers automatically when an ally is downed within range. Combine that with the Leopard skin (an official skin the developer shipped specifically for this employee) and the Wrangler reads as the developer's intended "tanky support" archetype on the character select screen.
The Wrangler also benefits from some of the cleanest upgrade names in the official verified list. Phantom Limb, Lockdown, and Connected Systems all interact with the Rocket Lasso in documented ways, and Impulse Vault pairs with Air Dash for an emergency escape that doubles as a repositioning tool for nearby allies. If you only learn one Mycopunk class for a support role, this is the one.
When to Bench the Wrangler for a Bruiser
Bruiser support is the right call when the squad already has a Wrangler or when the mission type rewards front-line presence. Abomination Assault, Ground Zero, and Planetary Defense all funnel squads into tight chokepoints where Shield Projector's cover bubble is more valuable than Air Dash's resets. The Brawler skin (the official Bruiser cosmetic) even leans into the "tanky front-liner" fantasy visually.
Bruiser support is harder to play well because Nose Dive commits the player to a forward dive that requires either a follow-up Shield Projector or a teammate peel to survive. Pair the Bruiser with a Wrangler in the squad and you get a classic "shield wall + reset" combo that can hold a doorway through an Amalgamation timer that the developer set to 30 seconds in the official patch notes.
Building the Mycopunk Wrangler Tanky Loadout
The Wrangler's loadout anchors on three core slots: primary weapon, secondary or grenade, and the upgrade grid selection. For a tanky support build, every slot should lean into survival, peel, and cooldown reduction rather than raw damage — prioritize mods that increase max HP, armor, or shield regeneration in the upgrade grid, pair a high-ammo primary with crowd-control or knockback utility for peeling divers off your squishies, and pick a grenade with area denial or healing ticks. A Wrangler running this setup can frontline a fungal swarm, draw aggro with a taunt or proximity aura, and still hand out heals or stims to the Mycopunk Cleric or Ranger behind them, turning the team into a slow but unkillable ball of attrition.
Weapon Choices for the Wrangler
| Weapon | Why It Fits Support | Caveat |
|---|---|---|
| Swarm Launcher | Telepathic Charging skin is official; soft crowd control | Slow reload punishes tunnel vision |
| Carver | Wide projectile arc helps peel for allies | Short optimal range |
| Lead Flinger | Heavy stagger on grouped enemies | Slow projectile travel |
| Shocklance | Storm's Eye upgrade is officially documented | Unlocks via Overtime Assignment |
| Diffraction Driver | Alt-fire halo can peel groups at range | Unlocks at player level 10 |
The Shocklance and Diffraction Driver are the two strongest support picks because both have alt-fire modes that do not require precise aim. The Shocklance's Storm's Eye is one of the only officially named upgrade interactions in the game, and the Diffraction Driver's halo spin-up lets the Wrangler peel a group of Pixies off a downed Scrapper without having to land headshots. Avoid the Laser Cannon and The Last Argument for a pure support build — they are duelist weapons that reward aggression, not peeling.
Grenade and Item Choices
For grenades, the Voltaic Grenade (renamed from Shock Grenade at 1.0) is the strongest peel tool because it stuns groups and sets up Air Dash resets. The Caustic Grenade (renamed from Acid Grenade at 1.0) is the second pick because the damage-over-time zone locks down doorways during an Amalgamation spawn. The Snowball Grenade is interesting because the developer has teased a "roll it down a hill" upgrade that grows the snowball's size — but its upgrade list is officially unpublished, so do not assume any specific roll-based interactions until the developer confirms them.
Healing items in Mycopunk are limited and are not a sustainable healing source. The real healing on a tanky support build comes from the upgrade grid's defensive nodes, Armor satchels (which drop from killed enemies and Blitseg hover bike runs), and the Death Protection charge system. The developer has confirmed Death Protection as a system but has not published the exact number of charges per mission, so the safest support play is to assume you have one and treat every death after that as a hard reset.
Upgrade Grid: The Defensive Layer
The hex-pattern upgrade board is where the tanky support build actually comes together — and unlike the damage build's selfish stacking, every node choice here has to be measured against squad-wide uptime. Spend Antimass Substrate at the Pattern Infuser in the HUB to roll new nodes, keeping in mind that reroll costs scale with the depth of the layer you're attempting, so chasing Epic-tier DR nodes on the outer ring burns substrate fast. Prioritize the following layers in order, and re-check this list after every major patch since Mycopunk's hex node pool has been reshuffled twice already:
-
Damage reduction nodes that apply to the whole squad (Munition Siphon, Saxonite Shackles)
-
Cooldown reduction on support abilities (Connected Systems, Impulse Vault)
-
Thorns / reflect nodes that punish enemies that hit you
-
Movement speed on kill to keep the Wrangler repositioning
The full upgrade list and farming routes are covered in the Mycopunk upgrade build guide, but the short version is that the support build wants the same Antimass budget a damage build wants, just spent on different rarities. Standard unlocks at level 3, Rare at 8, Epic at 16, and Exotic+ at 30 — so the support build is not "online" until the squad hits player level 30.
Mycopunk Character XP, Levels, and When the Build Comes Online
Character XP is a separate progression track from player level, and the two interact in ways the developer has documented but players frequently misread. Every Mycopunk class has its own employee level cap of 30, and reaching employee level 30 is the prerequisite for equipping the Exotic+ rarity nodes that define an end-game support build. The level-by-level breakdown of employee progression is detailed in the Mycopunk employee levels guide, but the milestones that matter for a tanky support build are:
| Employee Level | Unlocks | Why It Matters for Support |
|---|---|---|
| 3 | Standard rotation nodes | First access to upgrade grid |
| 8 | Rare rotation nodes | Defensive Rare-tier nodes unlock |
| 10 | Diffraction Driver (player level, not employee) | Strongest support weapon becomes available |
| 16 | Epic rotation nodes | Epic-tier cooldown reduction nodes |
| 30 | Exotic+ rotation nodes | End-game support build comes online |
If you are trying to roll a support build on a new character, the realistic timeline is: hit employee level 30 on the Wrangler, then start spending Strange Components at the Turbocharge station in the HUB to chase the specific Exotic+ defensive nodes your squad needs. Strange Components drop primarily from Ouroboros runs, so the support player should expect to grind the 13-room Ouroboros Blitz until they can afford the pieces.
Leveling Faster: Practical Tips
The fastest way to farm Mycopunk character XP is to stack Threat 7 missions with the Escalation modifier, which roughly doubles XP gain and also bumps Saxonite drop rate to about 60% per kill. The Wrangler levels fastest when the squad prioritizes high-threat Prized Possession missions because the extraction timer forces long engagements, which means more XP-over-time. Battery Barry rescue missions in particular are a sweet spot — they are short, high-density, and reward the squad with Antimass Substrate that the support player can immediately sink into the upgrade grid.
A common mistake is to level every employee in parallel. That spreads Antimass thin and leaves the support player unable to afford Exotic+ nodes on any single employee. Commit to one tanky support employee, level it to 30, then start branching into the Bruiser and Glider as secondary picks. The Glider build in particular is a strong second support — the Mycopunk Glider build covers how to use Wingsuit mobility as a backline peel tool, which complements the Wrangler's front-line playstyle.
How to Play the Tanky Support in Practice
A tanky support build is not just a loadout — it is a playstyle. The Wrangler on a support loadout should not be chasing damage numbers; the role is to peel, reset cooldowns, and create windows for the squad's damage dealers to do their jobs.
Combat Loop
Every 30 to 45 seconds in a high-threat mission, expect a heavy spawn wave, and the Mycopunk support build's survival window is razor-thin during that interval because enemy density spikes faster than most Wranglers can reposition. The Wrangler's job in that window is to act as the squad's tempo-setter: identifying spawn priority targets, anchoring behind the frontline, and converting cooldowns into rescue opportunities before the wave's second push arrives.
-
Open with Rocket Lasso to yank the highest-priority target (usually a Devastator, Missilehead, or Abomination Lacerator) out of the spawn group
-
Drop a Voltaic Grenade at the chokepoint the rest of the wave is funneling through
-
Hold position behind the Bruiser's Shield Projector (if a Bruiser is on the squad) and use Air Dash defensively rather than offensively
-
Reset cooldowns by tapping any downed ally — the support player should be the first one to a downed teammate, because the Air Dash reset only triggers when the ally is in the downed state, not when they are already dead
The Mycopunk tank build philosophy is to let the enemies come to you. Pushing forward into a spawn room without the squad is how support players die, and a dead support is worse than a dead damage dealer because the support's death usually cascades into a squad wipe.
Support Positioning Mistakes That Get Squads Wiped
The single biggest mistake is using the Wrangler's abilities offensively. Air Dash into a spawn room, Rocket Lasso a Brute for the style points, then die before the reset triggers — it is a very common failure pattern. The second biggest mistake is ignoring the upgrade grid in favor of grinding weapon levels. Weapon level 32 is the cap where the weapon stops gaining levels, but that is meaningless if the upgrade grid has no defensive nodes equipped. The third mistake is treating the tanky support build as a solo queue build. It works in solo, but it shines in a coordinated four-player squad, especially in Ouroboros and Escalation modifiers where the squad's survival depends on a dedicated peel player.
Synergies with Other Squad Members
The Wrangler support pairs especially well with the Scrapper. Scrapper's Grapple Pole can pull a Wrangler out of a bad position, and the Wrangler's Air Dash can return the favor. Pair the Wrangler with a Glider second support and the squad gains two layers of mobility peel — the Glider repositions the backline, the Wrangler resets the front line, and the two damage dealers have a clean window to do their jobs. Avoid stacking two Wranglers on the same squad, because the Air Dash resets compete for the same downed-ally trigger and the second Wrangler's value drops sharply.
Healing, Antimass, and End-Game Optimization
End-game Mycopunk is a resource game. Antimass Substrate, Strange Components, and Saxonite are the three currencies that actually matter, and the tanky support build is the most resource-hungry of the three archetypes because it needs to spend on defensive nodes, cooldown reductions, and the Exotic+ rarities that make the build work.
Currency Priority for Support Builds
| Currency | Source | Priority for Support Build |
|---|---|---|
| Antimass Substrate | Incursion and high-threat missions | High — fuels the upgrade grid |
| Strange Components | Ouroboros runs, exotic drops | Very High — Turbocharge station purchases |
| Saxonite | Roughly 60% drop at Threat 7 | Medium — spent at Pattern Infuser |
The Incursion mission type unlocks at player level 13 and is the most reliable Antimass farm. The Ouroboros roguelike and the 13-room Ouroboros Blitz variant are the best Strange Component sources, and Threat 7 Escalation missions are the best Saxonite farm. The support player should plan their week around one Antimass farm, two Strange Component farms, and one Saxonite farm — in that order, because Strange Components are the bottleneck.
When the Build Is "Done"
The Mycopunk support build is functionally complete when the Wrangler hits employee level 30, the upgrade grid has at least three Exotic+ defensive nodes equipped, and the squad has cleared an X11-B mission (the 1.0 high-difficulty moonlet) without a wipe. The developer has not published the exact X11-B room count or enemy list, but periodic electromagnetic storms that disable abilities make it the ultimate test of a tanky support build. If the squad can survive a storm window with the support Wrangler holding the line, the build is ready for any mission type Mycopunk throws at it.
Known Issues That Affect the Build
The 1.0 Known Issues list includes a few items that directly affect support builds. Two Fulfillments (the 1.0 achievement/cosmetic system that rewards Hats) are not progressing at launch — the developer referenced the activate relay towers and rescue bags of Saxitos Fulfillments without naming them, and a Bunker Buster threshold bug is also unfixed. The Mycologist's cape cosmetic is missing. None of these block the support build, but they do mean that some cosmetic rewards on the end-game support path will not appear until a future patch resolves the bugs.
Frequently Asked Questions
What is the best Mycopunk class for a tanky support build?
The Wrangler is the strongest dedicated support pick because Air Dash resets downed allies and Rocket Lasso yanks priority targets out of cover. The Bruiser is the second pick for squads that need a front-line Shield Projector wall. Both are detailed in the Mycopunk characters list along with the Glider, Scrapper, and the newly unlocked Mycologist.
Can a solo player run a tanky support build in Mycopunk?
Yes, but the build shines brightest in a coordinated four-player squad. Solo support play is viable in Ouroboros Blitz and Prized Possession missions, but the support player should expect to lean on Death Protection charges and Armor satchels more heavily because there is no second peel player to cover mistakes.
What is the fastest way to level Mycopunk character XP for the support build?
Stack Threat 7 Escalation missions with high-density enemy spawns. Prized Possession missions with Battery Barry as the rescue target offer the best XP-per-minute ratio, and Escalation modifiers roughly double the gain. Prioritize one employee to level 30 before branching.
Do healing items replace the support build in Mycopunk?
No. Healing items exist but they are limited, not stackable, and the HUB vendor does not sell potions in bulk. Real support healing comes from upgrade grid defensive nodes, Death Protection charges, and Armor satchels dropped by Blitseg hover bike runs. The tanky support build is the only reliable sustain layer in end-game content.
What is the difference between the Mycopunk tank build and the support build?
A tank build focuses on raw damage absorption and front-line presence (Bruiser with Shield Projector), while a support build focuses on peeling, cooldown resets, and squad survival (Wrangler with Air Dash). Both are tanky, but the tank build soaks damage and the support build prevents the squad from taking damage in the first place. Many high-threat squads run both at once.